
ryobi pressure washer 3000 psi manual
Need a Ryobi 3000 PSI pressure washer manual? Find yours instantly! Download, view, or print – get cleaning fast with our easy-to-use guides. ✨
Ryobi Pressure Washer 3000 PSI Manual: A Comprehensive Guide
This manual provides detailed instructions for the Ryobi 3000 PSI pressure washer, covering setup, operation, maintenance, and troubleshooting, ensuring optimal performance and longevity.
It includes guidance on detergent usage, specific model information like the 524GE and 3302, and even touches upon related systems like the AB Dick 9995 dampening system.
Understanding stripe settings and form roller adjustments, relevant to Ryobi press systems, is also briefly addressed within this comprehensive resource for users.
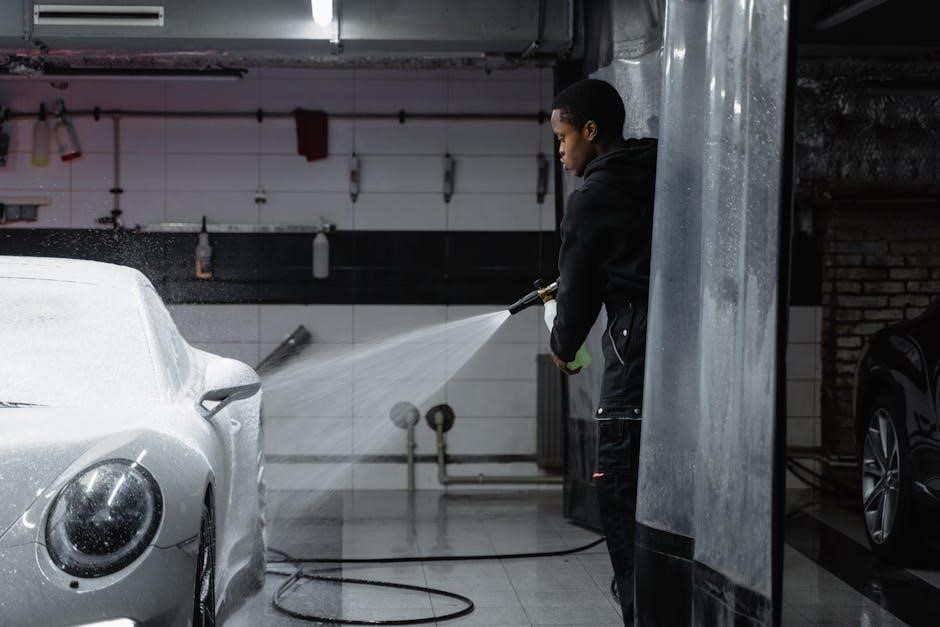
Welcome to the world of powerful cleaning with your Ryobi 3000 PSI pressure washer! This versatile machine is designed to tackle a wide range of cleaning tasks, from washing vehicles and siding to revitalizing decks and driveways. This manual serves as your comprehensive guide, ensuring you harness the full potential of your new cleaning tool.
Before you begin, it’s crucial to understand that the Ryobi 3000 PSI model, and related systems, demands careful operation and maintenance. While this guide focuses on the pressure washer itself, it acknowledges connections to other technologies, such as those found in printing presses – referencing systems like the AB Dick 9995 dampening system, demonstrating Ryobi’s broader engineering expertise.
This manual will walk you through every step, from unboxing and setup to operation and storage. We’ll cover safety precautions, nozzle selection, detergent usage, and troubleshooting common issues. Remember, proper care will extend the life of your pressure washer and maintain its optimal performance.
Understanding Pressure Washer Safety
Safety is paramount when operating your Ryobi 3000 PSI pressure washer. The high-pressure water stream can cause serious injury if misused. Always wear safety glasses or goggles to protect your eyes from debris. Closed-toe shoes are essential, and consider gloves for hand protection.
Never point the wand at yourself or others. Keep children and pets away from the operating area. Before connecting to the water supply, ensure the water source has adequate pressure and volume. Avoid using the pressure washer on electrical components.
Be mindful of the surface you are cleaning; excessive pressure can damage delicate materials. Always disconnect the power source (or turn off the engine) before performing any maintenance or changing nozzles. Remember, even seemingly minor adjustments, like stripe settings on related Ryobi press systems, require focused attention to safety.
Key Features of the Ryobi 3000 PSI Model
The Ryobi 3000 PSI pressure washer boasts a powerful engine, delivering substantial cleaning force for various tasks. It features a high-pressure hose designed for durability and flexibility, ensuring efficient water delivery. Multiple quick-connect nozzles are included, allowing users to customize the spray pattern for different surfaces and cleaning needs.
A detergent tank enables convenient application of cleaning solutions, enhancing cleaning performance. The trigger handle provides ergonomic control, reducing fatigue during extended use. While seemingly unrelated, the precision found in Ryobi press systems, like the 524GE, reflects a similar commitment to quality in their pressure washer line.
This model is designed for both residential and light commercial applications, offering a balance of power and portability.

Setting Up Your Pressure Washer
Proper setup is crucial for safe and effective operation; this section details unboxing, hose connection, nozzle attachment, and water supply integration.
Unboxing and Component Checklist
Upon receiving your Ryobi 3000 PSI pressure washer, carefully inspect the box for any signs of damage during shipping. Once opened, verify that all components are present before proceeding.
The package should include the pressure washer unit itself, a high-pressure hose, a spray wand, a selection of quick-connect nozzles (typically varying spray patterns), a detergent tank, and this comprehensive user manual.
Additionally, confirm the presence of any included accessories, such as a foam cannon or surface cleaner. For gas-powered models, ensure an oil bottle is included. Carefully compare the contents against the parts list detailed within this manual.
If any components are missing or damaged, immediately contact Ryobi customer support for assistance and replacement parts. Do not attempt to operate the pressure washer with missing or damaged components.
Connecting the High-Pressure Hose
Before connecting the high-pressure hose, ensure the pressure washer’s power source is disconnected – either unplugged for electric models or the engine is switched off for gas-powered units.
Locate the high-pressure hose and the corresponding connection port on the pressure washer pump. Hand-tighten the hose connector onto the pump outlet, ensuring a secure and leak-proof connection.
Next, connect the other end of the high-pressure hose to the spray wand or any attached accessories. Again, hand-tighten securely. It’s crucial to completely uncoil and straighten the hose to prevent kinks, which can damage the hose and reduce water pressure.
Double-check all connections for tightness before proceeding. A loose connection can result in water leakage and reduced performance. Refer to the diagrams in this manual for visual guidance.
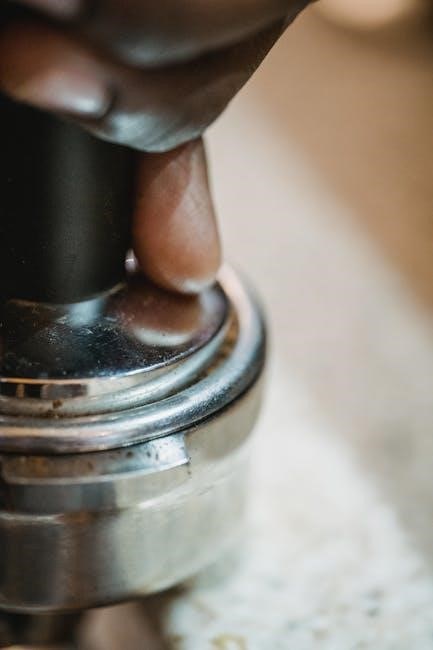
Attaching the Spray Wand and Nozzles
Begin by ensuring the pressure washer is disconnected from the power source. Locate the spray wand and the trigger handle on the pressure washer unit. Align the wand securely with the handle and push until it clicks into place, confirming a firm connection.
Next, select the appropriate nozzle for your cleaning task. Ryobi pressure washers typically include a variety of nozzles, each designed for different spray patterns and intensities.
To attach a nozzle, firmly twist it into the nozzle holder on the spray wand. Ensure it’s securely fastened before operation. Different nozzles are suited for various surfaces – wider angles for general cleaning, and narrower angles for concentrated power.
Always test the spray pattern on an inconspicuous area before applying it to the entire surface.
Connecting the Water Supply
Before connecting, ensure the pressure washer is switched off and unplugged (for electric models) or the engine is off (for gas models). Locate the water inlet on the pressure washer pump. Attach a standard garden hose to this inlet, securing it tightly with the provided connector.
Ensure the garden hose is fully uncoiled and free from kinks to maintain consistent water flow. Turn on the water supply slowly, allowing the pressure washer pump to fill with water.
Check for any leaks at the connection points and tighten as needed. Never draw water from a source contaminated with chemicals or debris, as this can damage the pump.
Proper water supply is crucial for optimal performance and longevity of your Ryobi pressure washer.
Operating Instructions
Follow these steps to safely and effectively operate your Ryobi 3000 PSI pressure washer, including starting, powering on, adjusting pressure, and nozzle selection.
Starting the Engine (Gas Powered Models)
Before attempting to start your gas-powered Ryobi 3000 PSI pressure washer, ensure the unit is on a level surface and the fuel valve is in the ‘OPEN’ position. Carefully check the oil level, adding oil if necessary, and confirm the spark plug wire is securely connected. Slowly pull the starter cord with a firm, steady motion; avoid rapid pulls.
If the engine doesn’t start after several attempts, allow the starter cord to retract fully before trying again. It’s crucial to avoid flooding the engine. Once started, allow the engine to warm up for a few minutes before applying full pressure. Always adhere to safety precautions, keeping hands and feet clear of moving parts. Remember to disconnect the spark plug wire when performing any maintenance or adjustments.
Regularly inspect the fuel line for cracks or leaks, and ensure proper ventilation during operation.
Powering On (Electric Models)
Before powering on your electric Ryobi 3000 PSI pressure washer, verify the power switch is in the ‘OFF’ position. Ensure the unit is plugged into a grounded outlet with the correct voltage – typically 120V. Inspect the power cord for any damage, such as cuts or fraying, and do not use if compromised.
Once connected, turn the power switch to the ‘ON’ position. The pressure washer should now be ready for operation. It’s important to avoid using extension cords if possible, but if necessary, use a heavy-duty, outdoor-rated cord. Always ensure the cord is fully extended to prevent overheating.
Be mindful of ground fault circuit interrupters (GFCIs) and ensure the outlet is protected. Never operate the pressure washer in wet conditions or with damp hands.
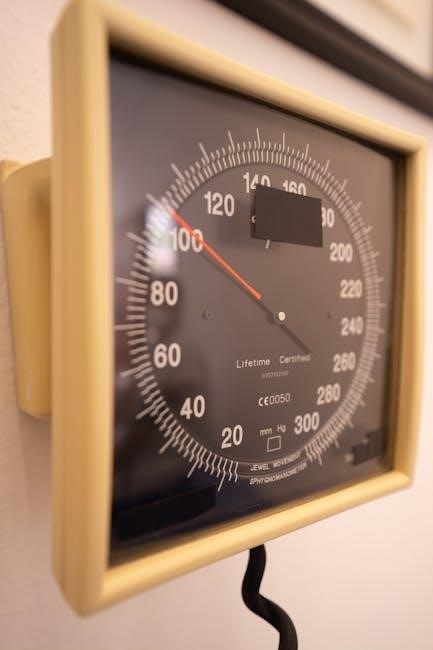
Adjusting Pressure Settings
Ryobi 3000 PSI pressure washers typically feature adjustable pressure settings, allowing you to tailor the cleaning power to the task at hand. These settings are usually controlled by a dial or knob located on the pump housing. Lower settings are ideal for delicate surfaces like painted wood or car finishes, preventing damage.
Higher settings are suitable for tougher jobs like concrete cleaning or removing stubborn grime. Always start with the lowest pressure setting and gradually increase it until you achieve the desired cleaning result. Avoid using maximum pressure on sensitive materials.
Experiment with different settings on an inconspicuous area first to test the effect. Remember to always wear appropriate safety gear, including eye protection, when adjusting and operating the pressure washer.
Using Different Nozzles for Various Tasks
The Ryobi 3000 PSI pressure washer comes equipped with a selection of interchangeable nozzles, each designed for specific cleaning applications. A 0-degree nozzle delivers a concentrated, powerful stream ideal for removing stubborn dirt and grime from hard surfaces like concrete, but use with caution.
A 15-degree nozzle provides a wider spray pattern for general cleaning tasks, while a 25-degree nozzle is suitable for washing cars and other delicate surfaces. A 40-degree nozzle offers a gentle spray for rinsing and cleaning larger areas.
A soap nozzle creates a low-pressure spray for applying detergent. Always select the appropriate nozzle for the task to maximize cleaning efficiency and prevent damage.

Maintenance and Troubleshooting
Regular maintenance, including cleaning, air filter checks, and hose inspections, ensures optimal performance.
Troubleshooting guides address common issues like no start or low pressure, alongside winterizing procedures for longevity.
Cleaning and Storing the Pressure Washer
After each use, thoroughly flush the pressure washer with clean water to remove any remaining detergent or debris. This prevents corrosion and ensures optimal performance for future operation. Disconnect both the high-pressure hose and the water supply, draining any residual water from both.
Wipe down the exterior of the unit with a damp cloth. Store the pressure washer in a clean, dry, and frost-free location. Avoid storing it in direct sunlight or extreme temperatures. Properly coil the high-pressure hose to prevent kinks and damage, and ensure all connections are secure.
Consider using a hose reel for convenient storage. Before long-term storage, especially during winter, follow the winterizing procedures outlined in the manual to protect the pump and internal components from freezing damage.
Checking and Replacing the Air Filter
Regularly inspect the air filter for dirt and debris. A clogged air filter restricts airflow to the engine, reducing performance and potentially causing damage. The frequency of checks depends on operating conditions; dusty environments require more frequent inspections. Locate the air filter housing, typically near the engine.
Carefully remove the air filter and examine it. If it appears dirty, gently tap it to remove loose particles. For heavily soiled filters, replacement is recommended. Ensure the replacement filter is the correct type for your Ryobi 3000 PSI model.
Install the new or cleaned filter securely, ensuring a proper seal to prevent unfiltered air from entering the engine. A properly maintained air filter contributes to efficient engine operation and extends the lifespan of your pressure washer.
Inspecting the High-Pressure Hose for Damage
Before each use, thoroughly inspect the high-pressure hose for any signs of wear, cuts, abrasions, or bulges. Damage to the hose can lead to leaks, reduced pressure, and potentially dangerous situations. Pay close attention to areas near the connections and where the hose bends during operation.
Carefully examine the hose along its entire length, feeling for soft spots or weakened areas. If any damage is detected, immediately discontinue use and replace the hose with a genuine Ryobi replacement part.
Never attempt to repair a damaged high-pressure hose; replacement is the only safe option. A compromised hose can burst under pressure, causing injury. Maintaining a safe and functional high-pressure hose is crucial for the reliable operation of your pressure washer.
Troubleshooting Common Issues: No Start
If your Ryobi 3000 PSI pressure washer fails to start, first verify the fuel valve (gas models) is in the ‘ON’ position and the tank contains sufficient fuel. For electric models, ensure the power cord is securely connected to a functioning outlet and the circuit breaker hasn’t tripped.
Check the engine’s on/off switch and confirm it’s set to ‘ON’. Inspect the spark plug (gas models) for fouling or damage; a replacement may be necessary. Also, ensure the air filter is clean, as a clogged filter can prevent starting.
If the issue persists, consult a qualified Ryobi service technician. Attempting repairs without proper knowledge could void the warranty or cause further damage. Remember safety first – disconnect the power source before any inspection.
Troubleshooting Common Issues: Low Pressure
Experiencing low pressure with your Ryobi 3000 PSI pressure washer? Begin by checking the high-pressure hose for kinks or obstructions. Ensure it’s fully uncoiled and straightened. Verify the spray nozzle isn’t clogged; remove and clean it thoroughly.
Confirm the water supply is fully turned on and provides adequate volume. A restricted water inlet will significantly reduce pressure. Inspect the pump for damage or wear, as internal issues can cause pressure loss.
If using a detergent tank, ensure the detergent intake isn’t blocked. A partially closed valve can limit water flow. For persistent low pressure, consult a Ryobi authorized service center for professional diagnosis and repair.
Winterizing Your Pressure Washer
Proper winterization is crucial to prevent damage from freezing temperatures. Begin by disconnecting the water supply and high-pressure hose. Drain all remaining water from the pump, hose, and detergent tank. Utilize a pump saver kit, adding antifreeze directly into the pump to lubricate and protect internal components.
Remove any remaining detergent and thoroughly flush the detergent tank with clean water. Store the pressure washer in a dry, sheltered location, away from freezing conditions.
Inspect the high-pressure hose for cracks or damage before storage. Consider lubricating the o-rings with silicone grease to maintain flexibility. Following these steps will ensure your Ryobi 3000 PSI pressure washer is ready for use when warmer weather returns.
Detergent Usage
This section details filling the detergent tank, adjusting the mixture for optimal cleaning, and recommends suitable detergents for your Ryobi 3000 PSI pressure washer.
Filling the Detergent Tank
Locate the detergent tank on your Ryobi 3000 PSI pressure washer; its position varies slightly depending on the specific model, but it’s generally a translucent container. Before filling, ensure the pressure washer is turned off and disconnected from both the power source (for electric models) and the water supply.
Carefully remove the tank cap and pour your chosen pressure washer detergent into the tank, being mindful not to overfill it. Refer to the detergent manufacturer’s instructions for proper dilution ratios, as using too much detergent can cause foaming and potentially damage the pump.
Always use detergents specifically formulated for pressure washers to avoid corrosion or malfunction. Once filled, securely replace the tank cap, ensuring a tight seal to prevent leaks during operation. Remember to check the detergent level periodically during extended use and refill as needed for consistent cleaning performance.
Adjusting Detergent Mixture
The Ryobi 3000 PSI pressure washer typically features a detergent adjustment knob or dial, allowing you to control the concentration of the cleaning solution. This control regulates the amount of detergent mixed with the high-pressure water stream, tailoring the cleaning power to the task at hand.
Start with the lowest detergent setting and gradually increase it until you achieve the desired level of foam and cleaning effectiveness. For lighter cleaning tasks, a lower concentration is sufficient, while heavily soiled surfaces may require a stronger mixture.
Avoid using excessive detergent, as it can lead to residue buildup and potential damage to the pump. Always refer to the detergent manufacturer’s recommendations for optimal dilution ratios. Experiment with different settings to find the ideal balance between cleaning power and efficiency for various surfaces and grime levels.
Recommended Detergents
Ryobi recommends using detergents specifically formulated for pressure washers to ensure optimal performance and prevent damage to the unit. Avoid using household cleaners, bleach, or abrasive chemicals, as these can corrode the pump and other components.
For general cleaning, a multi-purpose detergent is suitable for most surfaces. For tougher stains, consider a specialized detergent designed for concrete, siding, or automotive applications. Biodegradable detergents are environmentally friendly and safe for use around plants and pets.
Always check the detergent label to ensure compatibility with your pressure washer and the surface you are cleaning. Dilute the detergent according to the manufacturer’s instructions and use the appropriate nozzle for the task.

Advanced Topics & Specific Models
This section delves into specialized Ryobi models like the 524GE and 3302, alongside related systems such as the AB Dick 9995 dampening system.
Ryobi 524GE Press Technician Information

Finding a qualified technician for the Ryobi 524GE press can be challenging, as experiences vary with service providers. Users have reported difficulties obtaining timely parts and service through Xpedx, leading some to explore alternative options like Ferrostaal. The need for a knowledgeable serviceman familiar with the intricacies of this specific model is paramount for effective troubleshooting and repair.
Common issues often require specialized expertise beyond general press maintenance. Experienced technicians can diagnose and resolve problems efficiently, minimizing downtime and ensuring consistent print quality. When seeking assistance, prioritize individuals with a proven track record working specifically with Ryobi presses, particularly the 524GE model, to guarantee a swift and accurate resolution to any technical challenges encountered.
Proper maintenance and timely repairs are crucial for maximizing the lifespan and performance of the Ryobi 524GE.
Ryobi 3302 Registration Issues
Users of the Ryobi 3302 press have encountered difficulties maintaining consistent registration during printing runs. This issue manifests as misalignment between colors or subsequent impressions, impacting the final print quality. Troubleshooting often involves meticulous adjustments to the press’s registration system, requiring a skilled technician to diagnose the root cause effectively.
Potential factors contributing to registration problems include improper plate mounting, worn rollers, or inaccuracies in the press’s mechanical components. Achieving stable registration demands precise calibration and a thorough understanding of the Ryobi 3302’s mechanics. Addressing these issues promptly is vital to prevent further complications and ensure consistent, high-quality output. Careful examination of the press’s alignment and adjustments is key.
Consistent registration is fundamental to professional printing results.
AB Dick 9995 Dampening System Compatibility (Related Ryobi Systems)
The AB Dick 9995 dampening system, often found in conjunction with Ryobi printing presses, presents compatibility considerations for maintaining optimal performance. Originally paired with Ryobi’s systems, some users have explored alternatives like Crestline 6500 dampeners when facing issues. However, experienced Ryobi technicians suggest that many problems stem from simple adjustment needs within the existing Ryobimatic system.
Proper maintenance and calibration of the 9995 system are crucial for consistent ink-water balance and print quality. Understanding the interplay between the dampening system and the Ryobi press mechanics is essential for effective troubleshooting. Seeking a knowledgeable Ryobi service technician can often resolve issues more efficiently than complete system replacements, ensuring continued compatibility and reliable operation.
Maintaining the original system with expert adjustments is often the most cost-effective solution.
Form Roller Adjustment (Ryobi Press Systems — Relevant Principles)
Precise form roller adjustment is paramount for consistent ink transfer and print quality on Ryobi press systems. A common debate revolves around stripe settings – some advocate for a 3.5 mil stripe to the plate and 3 mil to the oscillator, while others recommend the reverse. The core principle is to avoid the plate driving the form roller; instead, the roller train should dictate its movement.
Correct adjustment ensures even ink distribution and prevents issues like smearing or insufficient ink coverage. Understanding the relationship between stripe settings, roller durometer, and ink viscosity is crucial for optimal results. Regular inspection and adjustment, performed by a skilled technician, are essential for maintaining consistent print quality and minimizing downtime on Ryobi presses.
Prioritizing the roller train’s control over the form roller is a key principle.
Understanding Stripe Settings (Ryobi Press Systems ー Relevant Principles)
Stripe settings on Ryobi presses significantly impact ink transfer and overall print quality. A recurring discussion centers on the optimal stripe configuration: a 3.5 mil stripe to the plate versus a 3 mil stripe to the oscillator. The fundamental goal is to ensure the form roller isn’t driven by the plate itself, but rather by the roller train.
Proper stripe adjustment contributes to even ink distribution, minimizing issues like ghosting or inconsistent color density. Factors like plate material, ink viscosity, and roller durometer all influence the ideal stripe setting. Experienced press operators understand the interplay of these variables and adjust accordingly.
Consistent monitoring and fine-tuning of stripe settings are vital for maintaining high-quality print production on Ryobi systems.