

th4110u2005 installation manual
Need help setting up your th4110u2005? Find the official installation manual & troubleshooting tips here. Get it done right, fast! ✨
The Honeywell TH4110U2005 T4 Pro offers programmable comfort and energy savings. Numerous online resources, including detailed installation manuals, simplify setup.
Accessing the user manual and installation guides ensures a smooth experience. This thermostat is rated highly by users seeking efficient climate control.
Downloadable manuals and support resources are readily available, making the TH4110U2005 a user-friendly choice for home temperature management.
Overview of the T4 Pro Programmable Thermostat
The Honeywell T4 Pro, model TH4110U2005, represents a significant step forward in home climate control. This programmable thermostat is designed for ease of use, offering both pre-programmed and customizable scheduling options. Online resources, including the comprehensive installation manual, guide users through a straightforward setup process.
Its intuitive interface and clear display icons simplify operation, while advanced features like temporary holds and overrides provide flexible temperature management. The T4 Pro supports various system types, including forced air and fan coil, adapting to diverse home heating and cooling configurations. Accessing the official user manual unlocks the full potential of this energy-efficient thermostat.
Key Features and Benefits
The Honeywell TH4110U2005 T4 Pro boasts several key features enhancing home comfort and efficiency. A primary benefit is its programmable scheduling, reducing energy waste. The detailed installation manual ensures a smooth, user-friendly setup. Clear display icons and intuitive button functions simplify operation.
Furthermore, temporary hold and override functions offer flexible temperature adjustments. Compatibility with various systems – forced air, fan coil – broadens its applicability. Accessing the official user manual unlocks advanced settings. Ultimately, the T4 Pro delivers reliable performance, energy savings, and convenient control over your home’s climate.
Unboxing and Package Contents
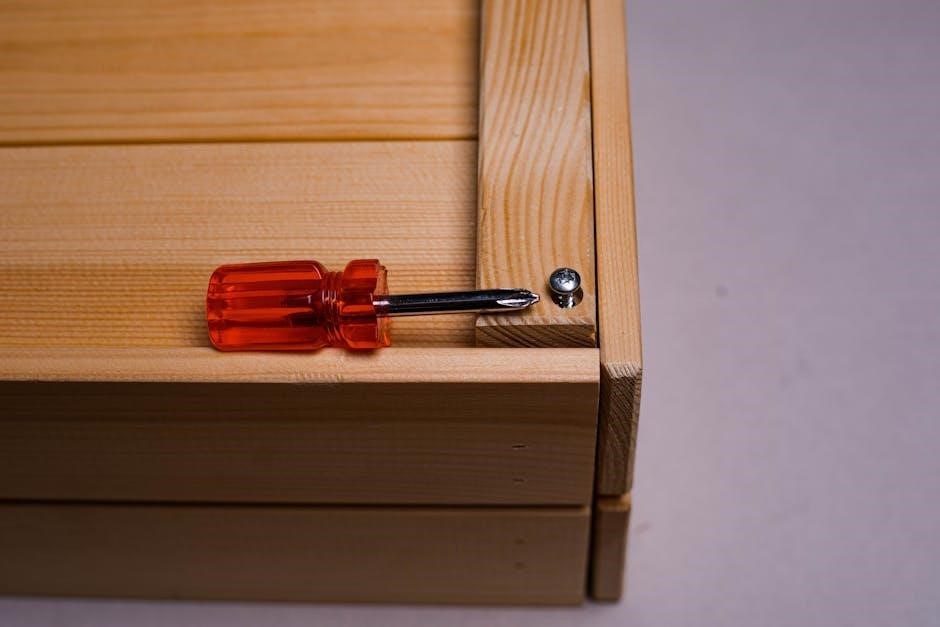
The TH4110U2005 package includes the thermostat, mounting base, screws, and a detailed installation manual. Verify all components are present and undamaged upon opening.
Identifying the Components
The Honeywell TH4110U2005 package contains several key components essential for a successful installation. Firstly, you’ll find the thermostat unit itself, featuring a digital display and control buttons. A separate mounting base plate is included, designed for secure wall attachment.
Small screws are provided for both the baseplate and the thermostat body. Crucially, the installation manual details each part’s function. It’s vital to familiarize yourself with these components before beginning. The manual also illustrates terminal block locations for wiring connections. Proper identification ensures correct installation and optimal performance of your new thermostat.
Checking for Damage
Before installation, thoroughly inspect all components of the Honeywell TH4110U2005 thermostat. Carefully examine the thermostat unit for any physical damage, such as cracks or dents to the casing or display screen. Verify the mounting base plate is intact and free from defects.
Check the wiring terminals for any signs of bending or breakage. The installation manual emphasizes the importance of undamaged parts. If any component appears damaged, do not proceed with installation. Contact Honeywell customer support for a replacement to ensure safe and reliable operation.

Installation Guide
Proper installation of the Honeywell TH4110U2005 requires careful adherence to the installation manual. Safety precautions and wiring diagrams are crucial for success.
Safety Precautions
Prior to installation, always disconnect power to your heating and cooling system at the breaker box to avoid electrical shock. Verify the system is off using a non-contact voltage tester.
Incorrect wiring can damage the thermostat or your HVAC equipment, so double-check all connections against the wiring diagram in the installation manual. If you are uncomfortable working with electrical wiring, consult a qualified HVAC technician.
Ensure the thermostat is installed in a location that is not exposed to direct sunlight, drafts, or excessive moisture. Follow all local electrical codes during installation. Read the entire manual before beginning.
Wiring Diagram and Terminal Identification
The TH4110U2005 utilizes standard HVAC wiring terminals. Common terminals include Rh (heating power), Rc (cooling power), W (heat), Y (cool), G (fan), and C (common – 24V power). Refer to the detailed wiring diagram within the installation manual for specific configurations.
ISU settings, like ISU 205 for electric forced air or fan coil, impact wiring. Carefully identify each wire before connecting it to the corresponding terminal. Incorrect connections can lead to system malfunction.
Always label wires before disconnecting the old thermostat to aid in accurate reconnection. Consult a qualified technician if wiring appears complex or unfamiliar.
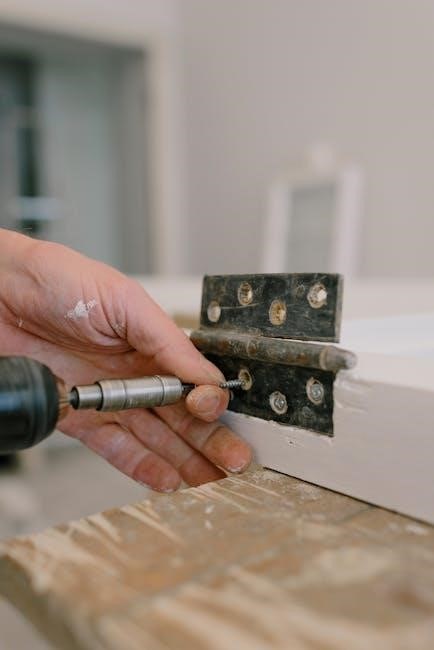
Mounting the Thermostat Base
Before mounting, ensure power is OFF at the breaker. Remove the existing thermostat baseplate. Use the included mounting screws and wall anchors (if needed) to securely attach the TH4110U2005 baseplate to the wall. Ensure the base is level for accurate temperature sensing.
Feed the thermostat wires through the opening in the baseplate. Double-check wire placement before proceeding. The installation manual provides visual guidance for proper baseplate alignment. A secure mount is crucial for stable operation and prevents future issues.
Connecting the Wires – Step-by-Step
Refer to the wiring diagram in the installation manual. Match each wire to the corresponding terminal on the thermostat base. Carefully insert each wire into its designated terminal, ensuring a secure connection. Avoid stripping the wire insulation excessively.
Gently tug on each wire to confirm it’s firmly held. Incorrect wiring can damage the system. Double-check all connections against the diagram before proceeding. The manual clearly illustrates terminal identification for various system types. Proper connections are vital for safe and efficient operation.
Attaching the Thermostat Body
Align the thermostat body with the mounted baseplate. Gently press the body onto the base until it clicks securely into place. Ensure it’s flush and properly seated to avoid connection issues. Do not force the body; re-check the alignment if resistance is met.
The installation manual provides visual guidance for proper attachment. A secure fit is crucial for reliable operation and display visibility. Verify the connection by lightly attempting to lift the body from the base. Proper attachment completes the physical installation process.
Initial Setup and Configuration
Power on your TH4110U2005 and follow the on-screen prompts. Set the correct date and time, then configure the system type for optimal performance.
Powering On the Thermostat
Upon completing the wiring process, ensure the power supply to the HVAC system is restored. The Honeywell TH4110U2005 should automatically power on when it receives consistent power. If it doesn’t, double-check all wire connections at both the thermostat base and the HVAC unit.
The display screen will illuminate, initiating a self-test sequence. This initial startup may take a few moments as the thermostat calibrates. Observe the screen for any error messages; consult the manual if any appear. A successful power-on indicates readiness for date, time, and system configuration.
Setting the Date and Time
After powering on, the Honeywell TH4110U2005 will prompt you to set the current date and time. Navigate through the menu using the thermostat’s buttons – typically ‘Menu’, ‘Up’, and ‘Down’. The user manual provides a detailed button function explanation.
Accurate date and time settings are crucial for proper scheduling functionality. Ensure you select the correct format (MM/DD/YYYY or DD/MM/YYYY) based on your regional preferences. Confirm your selections before saving, as incorrect settings will affect programmed schedules. Proper timekeeping ensures optimal energy efficiency.
System Type Configuration (Forced Air, Fan Coil etc.)
Correct system type configuration is vital for the TH4110U2005 to operate efficiently. Access the settings menu and locate the ‘System Type’ option. Choices include Forced Air, Fan Coil, and others, depending on your HVAC setup. Refer to the installation manual for specific guidance.
Selecting the wrong system type can lead to improper heating or cooling. The manual details ISU settings, like ISU 205 for Electric Forced Air/Fan Coil. Accurate configuration ensures the thermostat correctly controls your heating and cooling equipment, maximizing comfort and energy savings.
Programming the Thermostat
The TH4110U2005 supports Manual and Auto modes for scheduling. The installation manual guides creating heating/cooling schedules and utilizing temporary holds for personalized comfort.
Understanding the Programming Modes (Manual, Auto)
The Honeywell TH4110U2005 thermostat offers two primary programming modes: Manual and Auto. In Manual mode, you directly control the heating and cooling system, overriding any pre-set schedules. This is ideal for short-term adjustments or when consistent programming isn’t needed.
Auto mode utilizes the programmed schedule you create, automatically adjusting temperatures based on the time of day and day of the week. The installation manual details how to set up these schedules. Utilizing Auto mode maximizes energy efficiency and comfort. Switching between modes is straightforward, allowing for flexible control.
Refer to your manual for detailed instructions.
Creating a Heating/Cooling Schedule
The Honeywell TH4110U2005 allows customized heating and cooling schedules for optimal comfort and energy savings. The installation manual guides you through programming different temperature settings for various times and days. You can establish unique schedules for weekdays versus weekends, accommodating diverse lifestyles.
Programming involves setting “wake,” “leave,” “return,” and “sleep” periods with corresponding temperatures. The thermostat remembers up to four periods daily. Detailed instructions within the manual explain how to navigate the programming interface; Regularly reviewing and adjusting your schedule ensures continued efficiency.
Download the manual for assistance.
Temporary Holds and Overrides
The Honeywell TH4110U2005 offers convenient temporary holds and overrides for immediate temperature adjustments. These features allow you to deviate from your programmed schedule without permanently altering it. A “hold” maintains a specific temperature for a defined duration, overriding the scheduled setting. The installation manual details how to activate and adjust hold times.
Overrides provide instant temperature changes, reverting to the programmed schedule at the next scheduled period. The manual clarifies the difference between holds and overrides, ensuring proper usage. These functions are ideal for unexpected events or temporary comfort preferences. Download the manual for detailed steps.

Understanding the Display and Buttons
The TH4110U2005 display utilizes icons to communicate system status. The installation manual explains each button’s function, simplifying thermostat operation and programming adjustments.
Display Icons and Their Meanings
The Honeywell TH4110U2005 thermostat’s display employs a series of icons to convey crucial system information at a glance. The installation manual details these symbols, ensuring users understand the current operational state. A flame icon indicates active heating, while a snowflake signifies cooling is engaged.
A fan symbol denotes fan operation, and battery indicators alert to low power. Icons also represent programming modes (Auto, Manual) and temporary hold status. Understanding these visual cues, as explained in the manual, allows for efficient monitoring and control of your home’s climate. Proper interpretation prevents confusion and optimizes performance.
Button Functions Explained
The Honeywell TH4110U2005 thermostat features intuitive button controls, thoroughly explained within the installation manual. The “Menu” button accesses advanced settings and programming options. “Up” and “Down” arrows adjust temperature setpoints and navigate menus. “Hold” temporarily overrides programmed schedules, maintaining a desired temperature.
The “Fan” button controls fan operation (Auto, On). Detailed instructions in the manual clarify each button’s function during setup and daily use. Mastering these controls ensures efficient operation and customization of your home’s heating and cooling system. Familiarity with these functions streamlines adjustments and maximizes comfort.

Troubleshooting Common Issues
The TH4110U2005 installation manual details solutions for power failures, incorrect readings, and connectivity problems. Consult it for guided troubleshooting steps and support resources.
Thermostat Not Powering On
If your TH4110U2005 fails to power on, the installation manual advises checking the circuit breaker or fuse box first. Ensure power is supplied to the thermostat wiring. Verify the thermostat base is securely mounted and properly connected to the wiring terminals.
Double-check all wire connections, referencing the wiring diagram in the manual. A loose connection is a common cause. Confirm the ‘C’ wire (common wire) is correctly connected, as it’s essential for power.
If issues persist, consult the manual’s troubleshooting section or Honeywell support for further assistance.
Incorrect Temperature Readings
According to the TH4110U2005 installation manual, inaccurate temperature readings often stem from improper thermostat placement. Avoid direct sunlight, drafts, or proximity to heat-generating appliances. Ensure the thermostat is mounted on an interior wall, away from external influences.
The manual suggests verifying the thermostat’s calibration. Some models allow for temperature offset adjustments within the settings menu. Check for obstructions blocking airflow around the thermostat.
If discrepancies continue, consult the manual’s troubleshooting guide or contact Honeywell support for expert assistance.
Connectivity Problems
The TH4110U2005 installation manual details troubleshooting for connectivity issues. First, confirm your home Wi-Fi network is functioning correctly and the thermostat is within range. Verify the correct Wi-Fi password was entered during setup, referencing the manual for guidance.
Restarting both the thermostat and your router can often resolve temporary connection glitches. Check for firmware updates via the Honeywell Home app, as outlined in the manual.
If problems persist, consult the manual’s support section or contact Honeywell customer service for further assistance.

Advanced Settings
The TH4110U2005 installation manual details ISU settings (like ISU 205) and system changeover options (manual/automatic) for customized control.
ISU Settings (ISU 205 – Electric Forced Air/Fan Coil)
The TH4110U2005 installation manual highlights the ISU 205 setting, crucial for electric forced air or fan coil systems. This setting dictates how the thermostat manages heating and cooling with these specific system types.
Note that this ISU option is only displayed within the thermostat’s menu if the system type is correctly configured as either Electric Forced Air or Fan Coil during initial setup.
Proper ISU configuration ensures optimal performance and prevents compatibility issues. Refer to the manual for detailed instructions on accessing and adjusting these settings for your particular HVAC setup.
System Changeover Settings (Manual/Automatic)
The TH4110U2005 installation manual details System Changeover settings, offering either Manual or Automatic operation. Manual changeover requires the user to actively switch between heating and cooling modes as needed, providing full control.
Automatic changeover, conversely, allows the thermostat to intelligently switch modes based on the set temperature and the current room temperature, enhancing convenience.
The manual notes that the thermostat can operate in either mode, depending on user preference and system requirements. Carefully consider your needs when selecting the appropriate setting.
User Manual and Support Resources
The TH4110U2005 boasts readily available online resources, including a downloadable manual and the Honeywell Home support website for assistance.
Direct customer support is also accessible for troubleshooting and installation guidance.
Downloading the Official User Manual
Accessing the official Honeywell TH4110U2005 user manual is straightforward, providing comprehensive guidance for installation, operation, and troubleshooting. Several websites host the document in PDF format, ensuring easy download and viewing on various devices.
Honeywell’s official website and dedicated thermostat guides offer direct links to the manual. These resources detail every aspect of the T4 Pro, from initial setup and programming schedules to understanding display icons and resolving common issues.
The manual simplifies complex procedures, making the installation process manageable for both DIY enthusiasts and professionals. It’s a crucial resource for maximizing the thermostat’s functionality and ensuring optimal performance.
Honeywell Home Support Website
The Honeywell Home support website serves as a central hub for all TH4110U2005 related assistance, including detailed installation guides and troubleshooting resources. It offers a wealth of information beyond the official user manual, such as frequently asked questions and helpful video tutorials.
Users can find specific guidance on wiring diagrams, system configuration, and programming schedules. The website’s search function allows for quick access to relevant information, streamlining the installation process and resolving any encountered issues efficiently.
Dedicated support forums and contact options provide direct access to Honeywell’s expert team.
Contacting Honeywell Customer Support
For direct assistance with your TH4110U2005 thermostat, including installation questions, Honeywell’s customer support team is readily available. While the online manual and support website offer extensive resources, personalized help is just a phone call away.
Contacting support ensures accurate guidance tailored to your specific setup and any challenges encountered during installation. They can clarify wiring diagrams, explain advanced settings, and troubleshoot connectivity issues.
Having your model number handy will expedite the process, allowing the representative to provide focused assistance.
Disposal and Recycling Information
Responsible disposal is crucial; consult local waste management for instructions. The manual advises contacting local authorities for proper recycling procedures.
Ensure environmentally sound practices when retiring your TH4110U2005 thermostat.
Responsible Disposal Practices
Properly disposing of your Honeywell TH4110U2005 thermostat is essential for environmental responsibility. Do not simply discard it with household waste. Electronic components contain materials requiring specialized handling. The official manual emphasizes contacting your local waste management authority for specific instructions regarding electronic waste (e-waste) recycling.
Many communities offer designated e-waste collection events or drop-off locations. These facilities ensure components are processed safely, recovering valuable materials and preventing harmful substances from entering landfills. Prioritize recycling whenever possible to minimize environmental impact and adhere to responsible disposal guidelines.
Always follow local regulations.
Local Waste Management Instructions
Determining the correct disposal method for your Honeywell TH4110U2005 thermostat requires checking with your local waste management services. Regulations vary significantly by location, so a general approach won’t suffice. The installation manual directs users to contact their local authorities for specific guidance on e-waste disposal.
Search online for your city or county’s waste management website. Look for information on electronic recycling programs, designated drop-off centers, or scheduled e-waste collection events. Some areas may offer curbside pickup for electronic devices. Following these instructions ensures compliance and responsible environmental stewardship.

Technical Specifications
The TH4110U2005 operates within a defined temperature range and power requirement. Refer to the installation manual for precise details regarding these specifications.
Understanding these parameters ensures proper functionality and compatibility within your home’s heating and cooling system.
Operating Temperature Range
The Honeywell TH4110U2005 thermostat is designed to function reliably within a specific ambient temperature range. While precise figures vary, the installation manual details the acceptable operating limits for optimal performance.
Generally, the thermostat will operate effectively in environments ranging from 32°F to 104°F (0°C to 40°C); However, exposure to temperatures outside this range, even temporarily, could potentially affect accuracy or cause temporary malfunction.
Consult the manual for specific guidance regarding extreme temperature conditions and recommended precautions to ensure the longevity and consistent operation of your thermostat.
Power Requirements
The Honeywell TH4110U2005 thermostat is typically powered by 24VAC (Volts Alternating Current). This low-voltage power is commonly supplied by the heating, ventilation, and air conditioning (HVAC) system’s control transformer.
The installation manual explicitly outlines the necessary wiring configuration to ensure proper power delivery. It’s crucial to verify that the HVAC system provides the correct voltage before connecting the thermostat.
Do not connect the thermostat to a higher voltage source, as this could cause permanent damage. Refer to the manual for detailed wiring diagrams and safety precautions regarding power connections.